Here is a super simple installation system that we have used in hundreds of studios. It uses commonly available hardware and provides a sturdy installation! 
Note: You do not need to install the system to have most of the desired effect of it. If the building substance is inferior, you would be better building walls from the traps than installing them on walls, for example. They stand on their own.
For example, look at the two studio rooms pictured below. One is an installed system and the other is arranged as a “no install” system. Both rooms are a similar size and with a similar amount of King Kong Bass Traps being added. The results are very similar!
Marking Sweet Spot/ listening position with tape (to find first reflection positions):
mark the centre of the short side of the room and the long side measurement multiplied by 0.38.
Aka. L x 0.38
And: W x 0.5
This will leave you sitting 38% down the length of the room from the front wall, central on the width axis.
-If not possible to sit at the optimal listening position of the room, just mark where your chair will be while listening/working.
Note: We actually use the 38% (37.75%) rule for the first acoustic measurement position, and then measure backwards and forwards in increments of 20cm to find the room’s particular “sweet spot”. The monitors should be in an equilateral triangle for this.
Determine the setup of the traps!
Do it for free with Kiss Your Ears online guides or hire us to help you.
We have created systems to guarantee pro results that even a monkey could use and make
them available for you.
The reality is you would need to cover all corners and reflective surfaces before you
exhaust the use of this kind of low frequency treatment.

Once you have chosen the positions you will install the traps in your room, you can pre-drill holes for the fittings in the backs of the traps so that the timber does not split.

Pro tip for efficient winding of screw hooks.
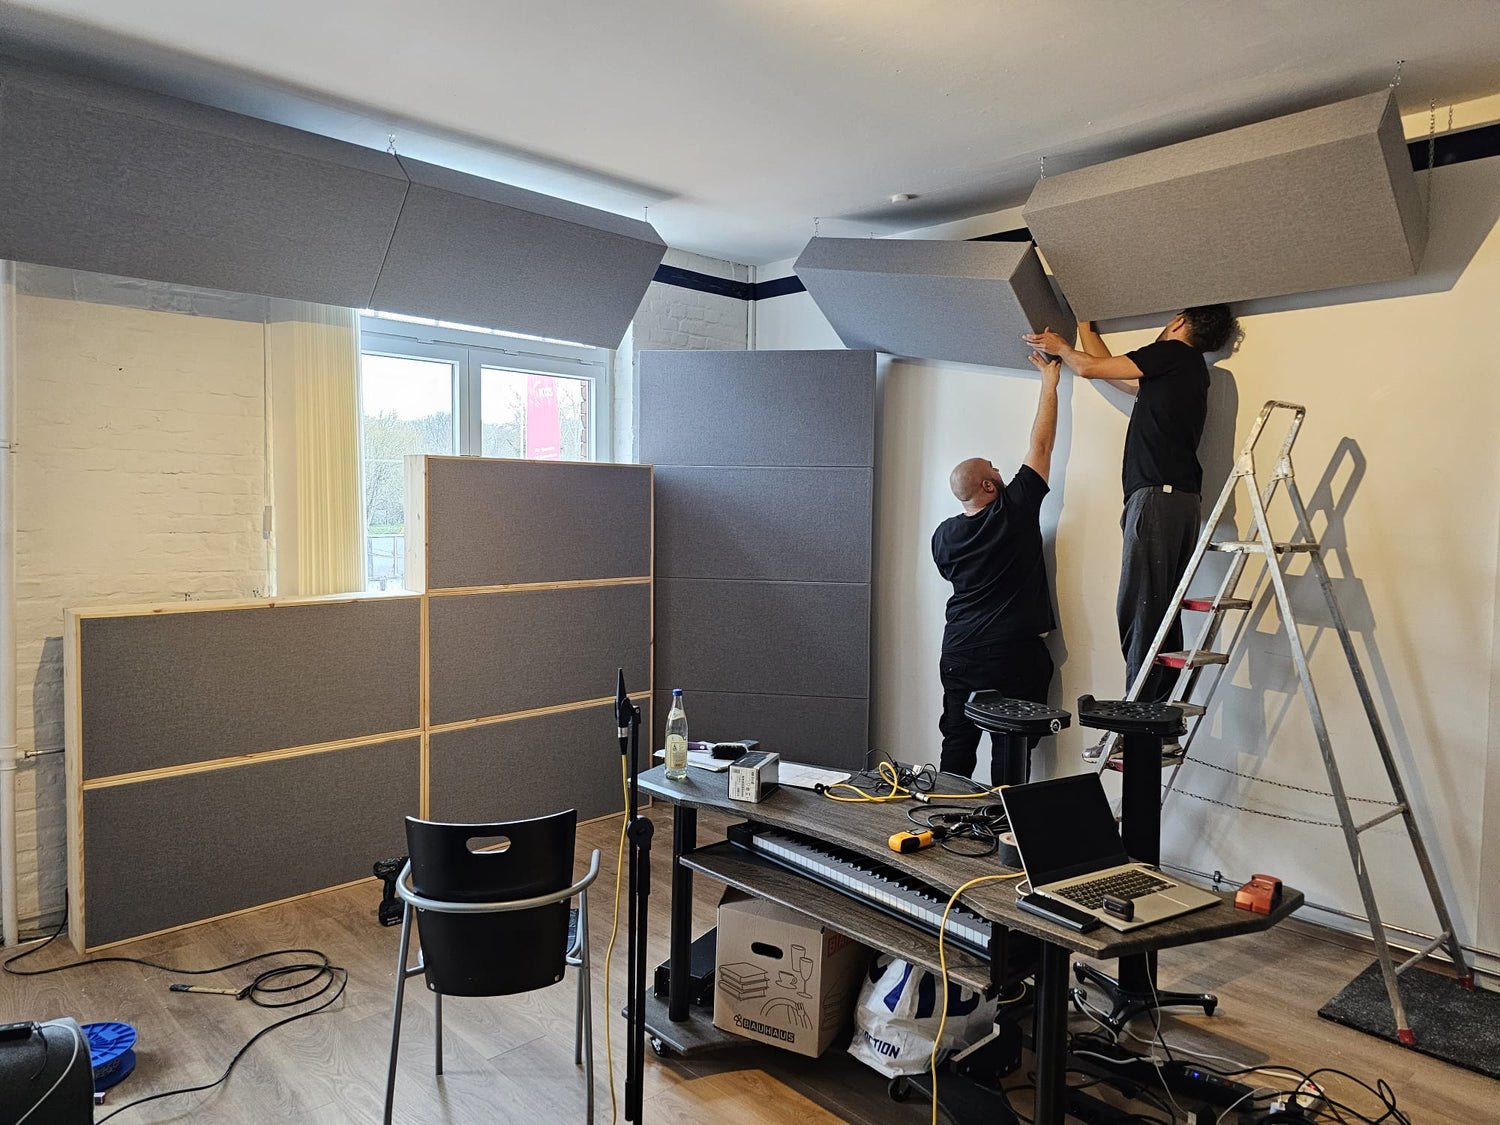
Different Locations and How To Install Them!
Front corner “towers”. Bass Trap function.
These are the primary bass trapping location in most cases because they are the easiest to
install and therefore represent the most low frequency absorption for the least amount of effort.
These can be oriented vertically or horizontally over the vertical corners.
Vertically, they take up less room. Horizontally, they reach lower frequencies more effectively by
extending the depth of air gap.


Connect hooks with chain.
Wall to ceiling corners. Bass Trap function.
Again, These can be oriented vertically or horizontally over the [horizontal] corners.
Connect the hooks on the ceiling to the hooks on the bass trap with chain.


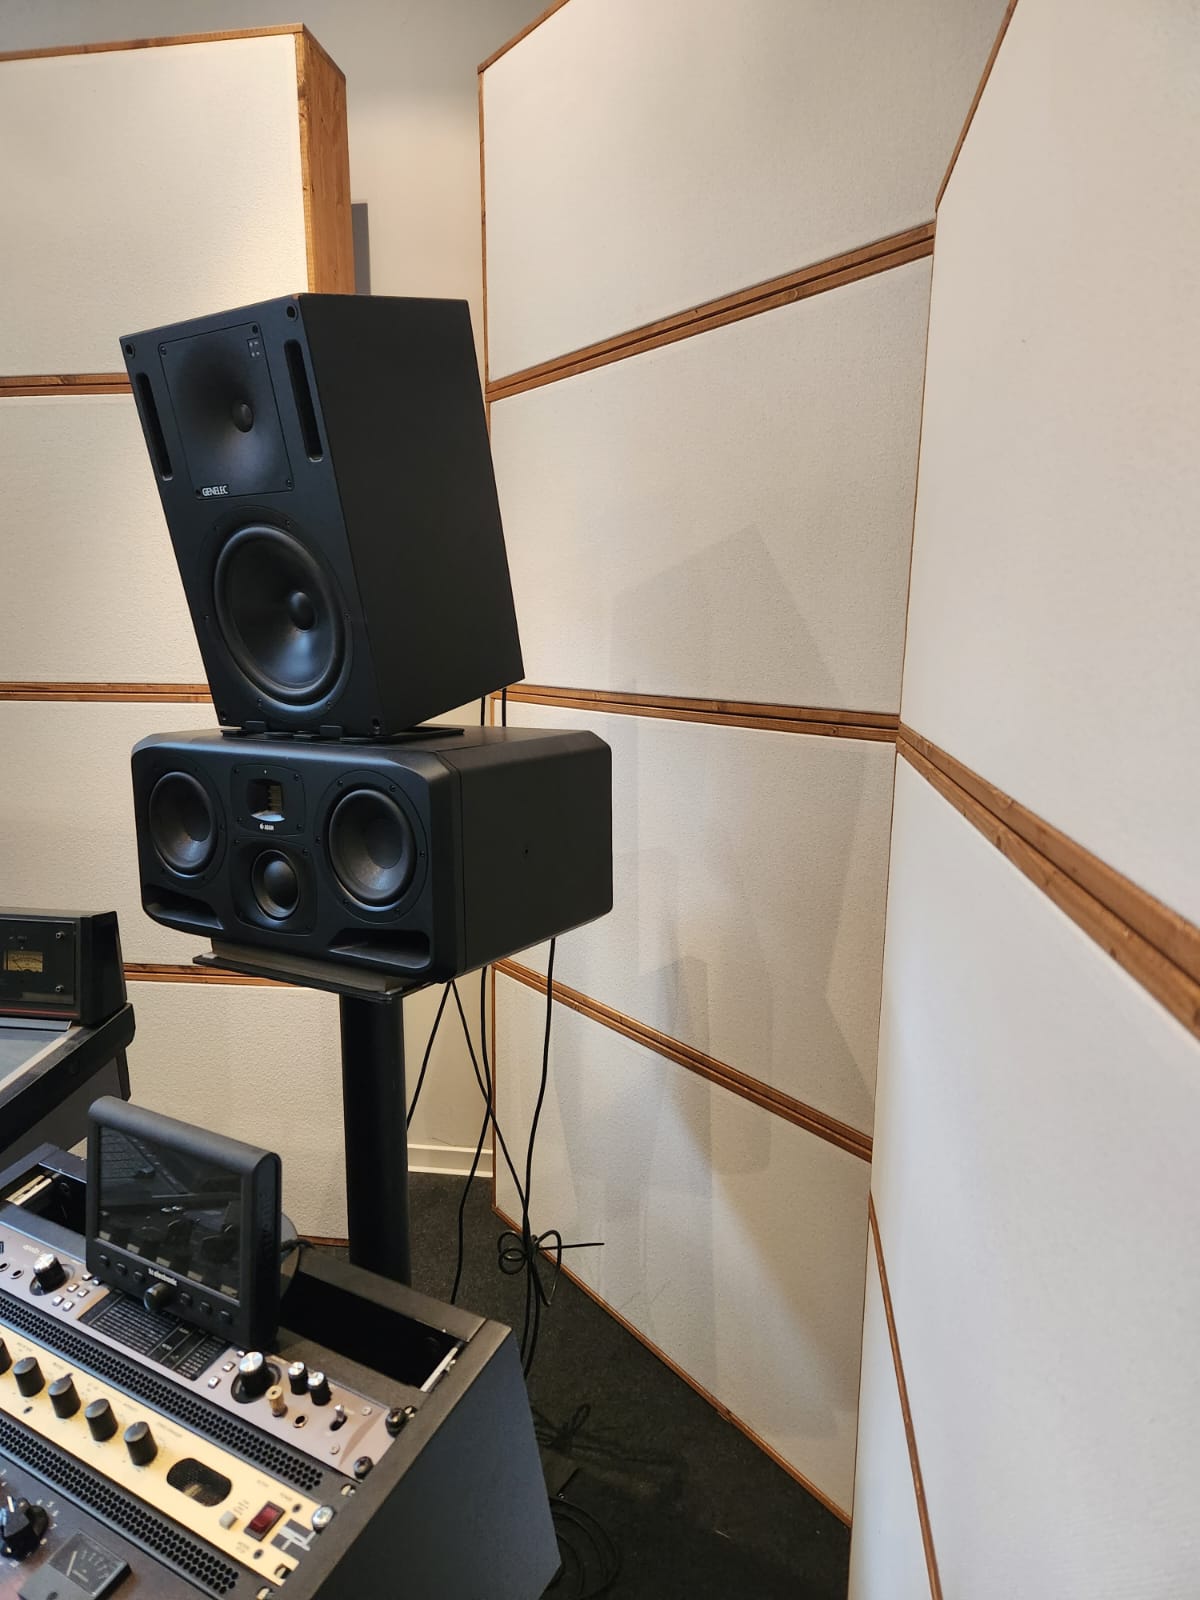
Installed on wall. Early Reflection function.
These can be oriented vertically or horizontally, like any other position.
Note: building “walls” from the absorbers covers both the ERP position AND the BT position.


By building walls out of the units (they have enough structure by design) to achieve a largersurface area and therefore absorb a larger splash radius. This also allows the use of air gaps, which is effective. The real bonus here, though, is that by organising the traps in such an array, you will automatically cover the wall to floor corner which is another bass trap function location.
Installed on ceiling. Early Reflection function.
Often referred to as a cloud, this is another early reflection point.

Have fun!


Leave a comment
All comments are moderated before being published.
This site is protected by hCaptcha and the hCaptcha Privacy Policy and Terms of Service apply.